We have moved to new digs!
A bit more rural, a lot more isolated but definitely more suited to my plans.
Monday, 2 July 2018
Sunday, 22 May 2016
Summer Maintenance
Well, it's got to be a year since I fitted the rainwater harvesting system so time to give the slow sand filter an inspection and overhaul.
I removed the filter from the facilities and took it outside for a tentative stripdown and 'recondition' and was pleasantly surprised to find very little needed doing. To be fair, I haven't used vast quantities of water...the occasional brew and handwash, but the filter was in extremely good condition.
The PU foam just needed a rinse out and the sand column looks in perfect order. The only major cleaning needed was to the bag prefilter (the foot off a pair of 80 denier stockings) which had trapped a fair bit of debris (mostly dust, pollen and bird-shit). Thoroughly rinsed out under the hot tap (yes, the sun is shining and I have lashings of hot water in the calorifier), and good to reassemble and refit the filter.
I'm rather pleased with performance. I may need to fit a new Pozanni filter cartridge on the drinking water side of things, but thus far the water is still of potable quality. Based of course only on smell and taste...but I'm fairly sure a bacterial test will show the water as plenty good enough.
Today's temperatures are being logged, the batteries are holding up nicely at around 13.1v and all systems are working as expected. My only niggle was lack of telephone thanks to rabbits chewing the CAT5 cable. How the internet stays up but they love chewing the 50v telephone cores is a mystery to me!
Cable duly spliced in a couple of places and now I have phone again.
I'm still a little wary of the lighting circuits. They were tripping out the RCD up at The Manor, but with it being very bright out today, the only light I am using is in the loo, and that is run from a fused spur off the power circuits.
I removed the filter from the facilities and took it outside for a tentative stripdown and 'recondition' and was pleasantly surprised to find very little needed doing. To be fair, I haven't used vast quantities of water...the occasional brew and handwash, but the filter was in extremely good condition.
The PU foam just needed a rinse out and the sand column looks in perfect order. The only major cleaning needed was to the bag prefilter (the foot off a pair of 80 denier stockings) which had trapped a fair bit of debris (mostly dust, pollen and bird-shit). Thoroughly rinsed out under the hot tap (yes, the sun is shining and I have lashings of hot water in the calorifier), and good to reassemble and refit the filter.
I'm rather pleased with performance. I may need to fit a new Pozanni filter cartridge on the drinking water side of things, but thus far the water is still of potable quality. Based of course only on smell and taste...but I'm fairly sure a bacterial test will show the water as plenty good enough.
Today's temperatures are being logged, the batteries are holding up nicely at around 13.1v and all systems are working as expected. My only niggle was lack of telephone thanks to rabbits chewing the CAT5 cable. How the internet stays up but they love chewing the 50v telephone cores is a mystery to me!
Cable duly spliced in a couple of places and now I have phone again.
I'm still a little wary of the lighting circuits. They were tripping out the RCD up at The Manor, but with it being very bright out today, the only light I am using is in the loo, and that is run from a fused spur off the power circuits.
Wednesday, 20 April 2016
Final Diagram of Dual Input Heating System
The gutter and solar collector are (obviously) external to the van body. The balance of the system is all contained in the 'Plant Room' or 'Toilet'. The towel rail is mounted in the kitchenette. CW and HW feed to the kitchenette go to the two taps on the kitchen sink.
The power for the electrical control systems and pumps can be provided from solar PV via an inverter rated at 300W but the 400W element is a bit too meaty for this so can only really be powered from the electrical hook-up to the body. To be fair, on days when the electrical heating needs to be used, I'll be running from grid power anyway. When running as a solar only system, total consumption is 60W (for the low power impeller pump). With electrical heating on and no solar, the total consumption is 480W (400W for the element and 80W for the pump). If there is some solar input and I'm using electric as backup, then maximum loading is 560W, although the element will be cycling because of the thermostat and the solar pump will only be operating in cycles because of the temperature controller.
I'm guessing that if I monitored this over time on the kWh meter, the mean consumption will be about 500Wh, or about 6p an hour for heating and hot water.
Sunday, 17 April 2016
Backup Heating System Nearly Completed
So I've managed to get some more time in down at the box as the B&Q gig is now finally over.
You can see here, the second coil (primary) has now been connected up and the lower insulated pipe coming in from the left of the photo is the feed and expansion pipe from the header tank.
Shown here is the second Grundfoss pump installed in the towel rail circuit. With the towel rail immersion element doing it's thing, hot water can now be circulated through the spare primary loop in the calorifier and thus transfer heat to the secondary. With no solar input from the collector panel, I can still generate a few litres of warm water for washing up or handwash.
I just need to get in among all the gubbins now and tidy up all the cables, clip the pipes into place and finish everything off. I still need to fit a frost stat so the system only kicks in when the temperature gets too low for comfort and a digital timer so I can 'program' the heating system.
I shall update my diagrams and post when I get a chance, but in essence I now have a dual-sourced central heating system. Solar input for the warm sunny days which is just used for water heating in summer (where, in theory, I won't want any space heating) and electrical input for the winter which also acts as background space heating in the kitchenette during the colder months. In between times, I can use a combination of both, so I should be sorted now for all states of the weather.
Thursday, 7 April 2016
Overworked!
I've not been in much. Long hours at the store as we are closing down and it has been all hands to the pumps.
Despite not getting much shed time in, I have been plotting and planning and amassing supplies for the next experiment.
Hydronic heating. This is the description of any heating system where the heat transfer medium is pumped water. A radiator is an example of a hydronic heater. Hot water is pumped through the rad, which gets hot and thus radiates heat. The water, now cooler because of thermal energy transfer, is returned to the boiler, heated up again and recirculated.
So I got to thinking. If the sun is out, then the solar panel heats my washing up water. If there isn't any sun, there isn't any hot water. So, I could use an immersion heater, only the 'hole' for the immersion heater element has been used for the microbore heat exchanger. Scratch that notion, unless I can find a way of injecting some heat elsewhere.
At the shop, we sell heated towel rails. Designed to plumb into the central heating just like a radiator, except they can have an element fitted to run them off electricity. Either way, they rely on the towel rail being filled with water for both heat transfer and for thermal mass. Which got me thinking. If I use the electric element to heat the water in the towel rail, perhaps I can pump it out, pump some more cold water in and then use it as both a water heater and a space heater.
Just by chance, I have a 'spare' microbore loop in my calorifier, so the plan is to use another circulator pump to circulate the water between the towel rail and the calorifier. In cold weather, or on very overcast days when there isn't any solar to be had, I can not only take the chill off the inside of the box, but possibly generate hot (or at least warm) washing up water.
Despite not getting much shed time in, I have been plotting and planning and amassing supplies for the next experiment.
Hydronic heating. This is the description of any heating system where the heat transfer medium is pumped water. A radiator is an example of a hydronic heater. Hot water is pumped through the rad, which gets hot and thus radiates heat. The water, now cooler because of thermal energy transfer, is returned to the boiler, heated up again and recirculated.
So I got to thinking. If the sun is out, then the solar panel heats my washing up water. If there isn't any sun, there isn't any hot water. So, I could use an immersion heater, only the 'hole' for the immersion heater element has been used for the microbore heat exchanger. Scratch that notion, unless I can find a way of injecting some heat elsewhere.
At the shop, we sell heated towel rails. Designed to plumb into the central heating just like a radiator, except they can have an element fitted to run them off electricity. Either way, they rely on the towel rail being filled with water for both heat transfer and for thermal mass. Which got me thinking. If I use the electric element to heat the water in the towel rail, perhaps I can pump it out, pump some more cold water in and then use it as both a water heater and a space heater.
Just by chance, I have a 'spare' microbore loop in my calorifier, so the plan is to use another circulator pump to circulate the water between the towel rail and the calorifier. In cold weather, or on very overcast days when there isn't any solar to be had, I can not only take the chill off the inside of the box, but possibly generate hot (or at least warm) washing up water.
The towel rail, with heater element fitted and hydronic connections. This is located in the kitchenette area, so if it only functions as a towel rail after all, I can at least dry my teatowels!
The pipework goes through the stud wall and into the 'facilities'. This might get an insulated jacket to minimise losses, or it might end up radiating some very low level heat into the loo. We'll see what happens once I commission the system.
I need some more pipe and a couple of 15mm to 10mm adapters to link into the second calorifier coil, and I also have to shoehorn in another Grundfoss circulator pump. One happened to avail itself thanks to me stripping the old oil boiler a couple of years ago. It was lurking in the chicken shed. I've just finished cleaning it up, wiring in a power cable and bench testing it. All looking good.
I may have to think about a feed and expansion system, but it might just work as a partially sealed system.
Saturday, 30 January 2016
More Uses For The Christmas Layflat Timber
After building myself a fairly substantial bookcase (ok, not particularly deep but 30" wide and taller than me!) I still had a fair stash of decent plank left.
Hobbit is still hankering after a dog, and we recently had an 'inspection visit' from a dog rescue place. We got the seal of approval subject to possibly putting another layer on the side fence in the garden.
"That's great," she tells the inspector, "as His faRTiness has some wood sculling about..."
An hour of sawing, drilling and screwing and we now have an additional foot on the garden fence.
Enough long 6" stuff to make a new top rail, and a couple of the 3" pieces were pressed into service as verticals to extend the existing posts which were a little short.
Hobbit is still hankering after a dog, and we recently had an 'inspection visit' from a dog rescue place. We got the seal of approval subject to possibly putting another layer on the side fence in the garden.
"That's great," she tells the inspector, "as His faRTiness has some wood sculling about..."
An hour of sawing, drilling and screwing and we now have an additional foot on the garden fence.
Enough long 6" stuff to make a new top rail, and a couple of the 3" pieces were pressed into service as verticals to extend the existing posts which were a little short.
I had a large bag of drywall screws salvaged from the floor of the firing range in Portishead, so the materials and construction just cost me an hour of my time.
A shame that the cloud came over a bit dark, but you get the general idea. A quick run down to Lampeter in search of Cuprinol Shades 'Barleywood' proved unrewarding. I did pick up a tin of what I thought was the right colour (Forget-Me-Not) in B&Q a while ago but turns out I had the wrong one. DL Williams in Lampeter usually stock it in the 1 litre can, but they didn't have any. B&Q don't do that colour in store, but another chap in Lampeter managed to get me a tin on order and it should be in on Tuesday. More photos to follow once I've got it painted.
And....there is still wood left!
Saturday, 2 January 2016
2016 Up and Running
I'm not hanging about this year. Two days in and the first project of the year is underway. Back in October, we built the 'Chrismas Grotto' in the store. Head office sent us a kit of parts to build a Christmas 'layflat'. Part of the kit was a set of timber frameworks which I had to assemble, fill with fake snow and then set out all the Christmas trees, LED deer and other electronic goodies.
Anyway, I had my eye on the wood. Just some rough-hewn whitewood, but I figured it might come in handy for firewood if I got the chance to cadge it from work after Christmas.
You can just make out the wooden frameworks in the picture above. With a word in the right ear, post-festivities, all the wood made its way home in the back of Pudgy.
Looking at it, it was actually reasonably decent wood. The planks were about 20mm thick, 160mm wide and in lengths between 1.2m and 2m. Rather than chop it up for firewood, I spent a couple of hours in the garage this evening with the circular saw and cordless drill. I had a quarter of a box of decking screws my Dad gave me back in the summer, so my total expenditure on materials was...nothing.
Hey presto...a much-needed bookcase for the bedroom.
Anyway, I had my eye on the wood. Just some rough-hewn whitewood, but I figured it might come in handy for firewood if I got the chance to cadge it from work after Christmas.
You can just make out the wooden frameworks in the picture above. With a word in the right ear, post-festivities, all the wood made its way home in the back of Pudgy.
Looking at it, it was actually reasonably decent wood. The planks were about 20mm thick, 160mm wide and in lengths between 1.2m and 2m. Rather than chop it up for firewood, I spent a couple of hours in the garage this evening with the circular saw and cordless drill. I had a quarter of a box of decking screws my Dad gave me back in the summer, so my total expenditure on materials was...nothing.
Hey presto...a much-needed bookcase for the bedroom.
Thursday, 31 December 2015
Goodbye 2015
The end of another year is in sight and it has been a very different year for me. Some things went according to plan but a lot of things didn't go quite as anticipated.
The year got off to it's usual relatively promising start with a decent run of work from my former employer. Portishead was ticking along quite nicely and I had the traditional maintenance visit to Urlay Nook, but come April everything dried up.
By June, things were looking a little desperate and the money was about to run out, so I had to start looking at alternative options. Out of the blue, some agency work arrived on the scene and over a two month period, I enjoyed five weeks contract work at the BMI Werndale Hospital acting as site engineer. One positive that came out of this was the opportunity to get my name on the books for a bank job in Materials and this has been a rather fun and enjoyable stopgap. I have continued to work with a lovely bunch of folks and although it is hardly a full-time job, it has kept a few ackers rolling in on a regular basis, and I have managed to maintain friendships forged during my contract time there.
A few other options I looked at didn't materialise...the driving job for Boots, a self-employed engineering post with Photo-Me and working as a parcel courier didn't come to fruition but after two attempts, I did manage to find a part-time position as a Customer Advisor with B&Q.
Funnily enough, I rather enjoy B&Q. I know it's not exactly 'challenging' and it is only minimum wage, but it does keep food on the table and a roof over our heads. With the Festive Season push, the overtime has been plentiful and they have kept me gainfully employed. Rather a pity, then, that the powers that be intend to close down our branch at the end of April and give us all our marching orders.
Looking forwards, I guess I have another four months of earning potential there, but other bright spots are already appearing on the horizon. There is the sniff of a few weeks work in Singapore doing what I do best, and talks of maintenance work here in the UK.
I dare say I'll get through this year just as I managed to get through the last. The office is pretty much finished now, and the project for 2016 up at The Manor is to set up the wood and metal shops and to help facilitate the relocation of a Public Footpath that is causing some issues, and to help get the new extension on the Manor up and doing for Mrs E. That will also mean sorting out trackways and site infrastructure and although it has diverted attention from the Eco-Tipis plan, it may turn out to be a net benefit in the overall scheme of things.
We'll see how things pan out. In the meantime, thank you for following the trials and tribulations of Retrotecchie over the last 12 months, and I hope you continue to enjoy my musings in the year ahead.
Wishing you a calm, peaceful and prosperous 2016.
RT
The year got off to it's usual relatively promising start with a decent run of work from my former employer. Portishead was ticking along quite nicely and I had the traditional maintenance visit to Urlay Nook, but come April everything dried up.
By June, things were looking a little desperate and the money was about to run out, so I had to start looking at alternative options. Out of the blue, some agency work arrived on the scene and over a two month period, I enjoyed five weeks contract work at the BMI Werndale Hospital acting as site engineer. One positive that came out of this was the opportunity to get my name on the books for a bank job in Materials and this has been a rather fun and enjoyable stopgap. I have continued to work with a lovely bunch of folks and although it is hardly a full-time job, it has kept a few ackers rolling in on a regular basis, and I have managed to maintain friendships forged during my contract time there.
A few other options I looked at didn't materialise...the driving job for Boots, a self-employed engineering post with Photo-Me and working as a parcel courier didn't come to fruition but after two attempts, I did manage to find a part-time position as a Customer Advisor with B&Q.
Funnily enough, I rather enjoy B&Q. I know it's not exactly 'challenging' and it is only minimum wage, but it does keep food on the table and a roof over our heads. With the Festive Season push, the overtime has been plentiful and they have kept me gainfully employed. Rather a pity, then, that the powers that be intend to close down our branch at the end of April and give us all our marching orders.
Looking forwards, I guess I have another four months of earning potential there, but other bright spots are already appearing on the horizon. There is the sniff of a few weeks work in Singapore doing what I do best, and talks of maintenance work here in the UK.
I dare say I'll get through this year just as I managed to get through the last. The office is pretty much finished now, and the project for 2016 up at The Manor is to set up the wood and metal shops and to help facilitate the relocation of a Public Footpath that is causing some issues, and to help get the new extension on the Manor up and doing for Mrs E. That will also mean sorting out trackways and site infrastructure and although it has diverted attention from the Eco-Tipis plan, it may turn out to be a net benefit in the overall scheme of things.
We'll see how things pan out. In the meantime, thank you for following the trials and tribulations of Retrotecchie over the last 12 months, and I hope you continue to enjoy my musings in the year ahead.
Wishing you a calm, peaceful and prosperous 2016.
RT
Saturday, 26 December 2015
Humbug Alleviated
Oh joy of joys. Christmas heralded the arrival of a new addition to the LEGO train set. A 60050 City Station, courtesy of the Hobbit. That took care of a couple of hours on Christmas morning and by tea time, the LEGO City Passenger train had two stops on it's oval of track.
I have the original 2011 series station, the 7937. The new one is bigger and in many ways better. The snack bar is pretty good, but it's the LEGO shop on the platform that really does it for me!
Thursday, 24 December 2015
Friday, 4 December 2015
LEGO Musings
I'm bidding for more train-related bits on Ebay and I have two shipments from Bricklink (one from France and one from Finland) inbound.
I really need to get a decent ladder, clear out the attic and get the layouts set up. On my 'stuff to do' list, it ranks at #143!
Completely Off Track
Or, to be technically accurate, on track. Stepping sideways for a moment, one of my guilty pleasures is LEGO. Specifically LEGO trains. I have a huge collection spanning 50 years, from the late 60's to the present day.
Things have changed from the early primitive days to the very complex and expensive sets of today with vast amounts of detail and a huge number of parts.
Track systems have changed several times, from the early 4.5v and 12v blue tracks and white sleepers, via the later grey tracks and dark grey sleepers and the later 12v systems, to the 9v track system (similar to Hornby type tracks) to the current Power Functions dark bluish-grey all-in one moulded tracks.
Older blue and grey tracks are pretty much compatible with each other (they fit together and track geometry is the same) and the 9v and PF track is compatible for fit and geometry. Without a little 'hacking', the two types of system are incompatible with each other. A 4.5v 1960's train will happily run on 2010 track and vice versa because track pitch (gauge) is the same but that is as far as it goes. Battery trains will run on any kind of track, 12v trains need the centre conducting rails for their power, but 9v trains can only run on 9v track, which makes them the 'odd man out'.
![]()
When LEGO changed from the blue to grey rails, they created a slightly different mould for the tracks, allowing an 'intermediate' sleeper to be fitted mid section to create a far more rigid track construction less liable to give way under stress and derail a train.
Well, it seems the very old blue tracks can also benefit from the intermediate sleepers to a huge degree. The rails do have a central 'pip' underneath them which secures the additional sleeper at exactly the right place. In all my years of playing with the trains, I had never even considered this, but it is such a simple modification that I don't know why it never dawned on me to do it. Once I get all my old track back up from Surrey, I will indeed deploy this method...it looks visually better too. I just need to buy about 500 2x8 white plates in order to be able to do it. No rush...another 50 years should see it done!
Things have changed from the early primitive days to the very complex and expensive sets of today with vast amounts of detail and a huge number of parts.
Track systems have changed several times, from the early 4.5v and 12v blue tracks and white sleepers, via the later grey tracks and dark grey sleepers and the later 12v systems, to the 9v track system (similar to Hornby type tracks) to the current Power Functions dark bluish-grey all-in one moulded tracks.
Older blue and grey tracks are pretty much compatible with each other (they fit together and track geometry is the same) and the 9v and PF track is compatible for fit and geometry. Without a little 'hacking', the two types of system are incompatible with each other. A 4.5v 1960's train will happily run on 2010 track and vice versa because track pitch (gauge) is the same but that is as far as it goes. Battery trains will run on any kind of track, 12v trains need the centre conducting rails for their power, but 9v trains can only run on 9v track, which makes them the 'odd man out'.
When LEGO changed from the blue to grey rails, they created a slightly different mould for the tracks, allowing an 'intermediate' sleeper to be fitted mid section to create a far more rigid track construction less liable to give way under stress and derail a train.
Well, it seems the very old blue tracks can also benefit from the intermediate sleepers to a huge degree. The rails do have a central 'pip' underneath them which secures the additional sleeper at exactly the right place. In all my years of playing with the trains, I had never even considered this, but it is such a simple modification that I don't know why it never dawned on me to do it. Once I get all my old track back up from Surrey, I will indeed deploy this method...it looks visually better too. I just need to buy about 500 2x8 white plates in order to be able to do it. No rush...another 50 years should see it done!
Tuesday, 1 December 2015
More Tatting
Skirting fitted in loo.
Cladding of partition wall finished. A slightly worrying meter reading on the charge controller. We've had no sun for over a week so the batteries are getting a little low for comfort.
Access panel for 12V services. Just some final tidying up of the wiring needed.
Door and frame given it's final coat of gloss paint.
Sunday, 29 November 2015
Tatting
That's about the size of it right now. Just a little tatting here and there to keep things ticking over and trying not to spend too much cash.
I'm putting a bit of cladding in the loo to finish off the walls, dabbing some gloss on the doorframe and door and just trying to finish off the odd jobs.
Some more skirting to go in here once all the cladding is finished and painted, and the seams to glue on the lino.
The loo is actually quite cosy and bright now, and the new 8.1W LED bulb is warmer and brighter than the old CFL.
Some builder's caulk to finish the seam between the cladding and the side walls, and another coat of paint and the front wall is beginning to look acceptable now.
I'm putting a bit of cladding in the loo to finish off the walls, dabbing some gloss on the doorframe and door and just trying to finish off the odd jobs.
Some more skirting to go in here once all the cladding is finished and painted, and the seams to glue on the lino.
The loo is actually quite cosy and bright now, and the new 8.1W LED bulb is warmer and brighter than the old CFL.
Some builder's caulk to finish the seam between the cladding and the side walls, and another coat of paint and the front wall is beginning to look acceptable now.
Wednesday, 18 November 2015
Finish Line In Sight
I did mean to do another update on Sunday, but what with one thing and another, I didn't get a round tuit.
Progress? I fitted the last of the skirting trim to the two sides and the office area is looking more tidy now. I have a few damp issues, but the dehumidifier is generating output and the carpet is waterproof and rot-proof so any dampness shouldn't cause a long term problem. I think it's the driving rain and wind that is pushing damp into the cracks and crevices and as soon as I get a few dry days, I need to finally caulk up any gaps and finish weather-sealing a couple of last small holes in the roof trim.
I have also replaced the 13W CFL in the kitchen with an 8W LED bulb. I wasn't expecting miracles but I have to admit I'm rather impressed. Firstly, it is a 'warm white' lamp so the light isn't as harsh and as blue as the GU10 LED spotlights in the office. Secondly, being LED and essentially a regulated DC system, the light doesn't suffer from voltage fluctuations at the end of the long line when using power tools or the kettle. That doesn't seem like a big deal, but it makes a difference.
To finish the otherwise bare window, I fitted a cheap B&Q Colours roller blind. Looks a lot more cosy now with the blind down.
So a bit more weatherproofing to finish, dry out the box a little, finish a little trimming between the front wall and the sides, finish cladding the loo and then one last section of ceiling insulation to install and then that's most of the hard work done. I still need another fiddle with the phone line...I picked up my messages having rejigged the connections, and half an hour later the line was dead again!
Progress? I fitted the last of the skirting trim to the two sides and the office area is looking more tidy now. I have a few damp issues, but the dehumidifier is generating output and the carpet is waterproof and rot-proof so any dampness shouldn't cause a long term problem. I think it's the driving rain and wind that is pushing damp into the cracks and crevices and as soon as I get a few dry days, I need to finally caulk up any gaps and finish weather-sealing a couple of last small holes in the roof trim.
I have also replaced the 13W CFL in the kitchen with an 8W LED bulb. I wasn't expecting miracles but I have to admit I'm rather impressed. Firstly, it is a 'warm white' lamp so the light isn't as harsh and as blue as the GU10 LED spotlights in the office. Secondly, being LED and essentially a regulated DC system, the light doesn't suffer from voltage fluctuations at the end of the long line when using power tools or the kettle. That doesn't seem like a big deal, but it makes a difference.
To finish the otherwise bare window, I fitted a cheap B&Q Colours roller blind. Looks a lot more cosy now with the blind down.
So a bit more weatherproofing to finish, dry out the box a little, finish a little trimming between the front wall and the sides, finish cladding the loo and then one last section of ceiling insulation to install and then that's most of the hard work done. I still need another fiddle with the phone line...I picked up my messages having rejigged the connections, and half an hour later the line was dead again!
Monday, 9 November 2015
Aaaarg! Colour Balance Issues
Grumble grumble grumble chunter...
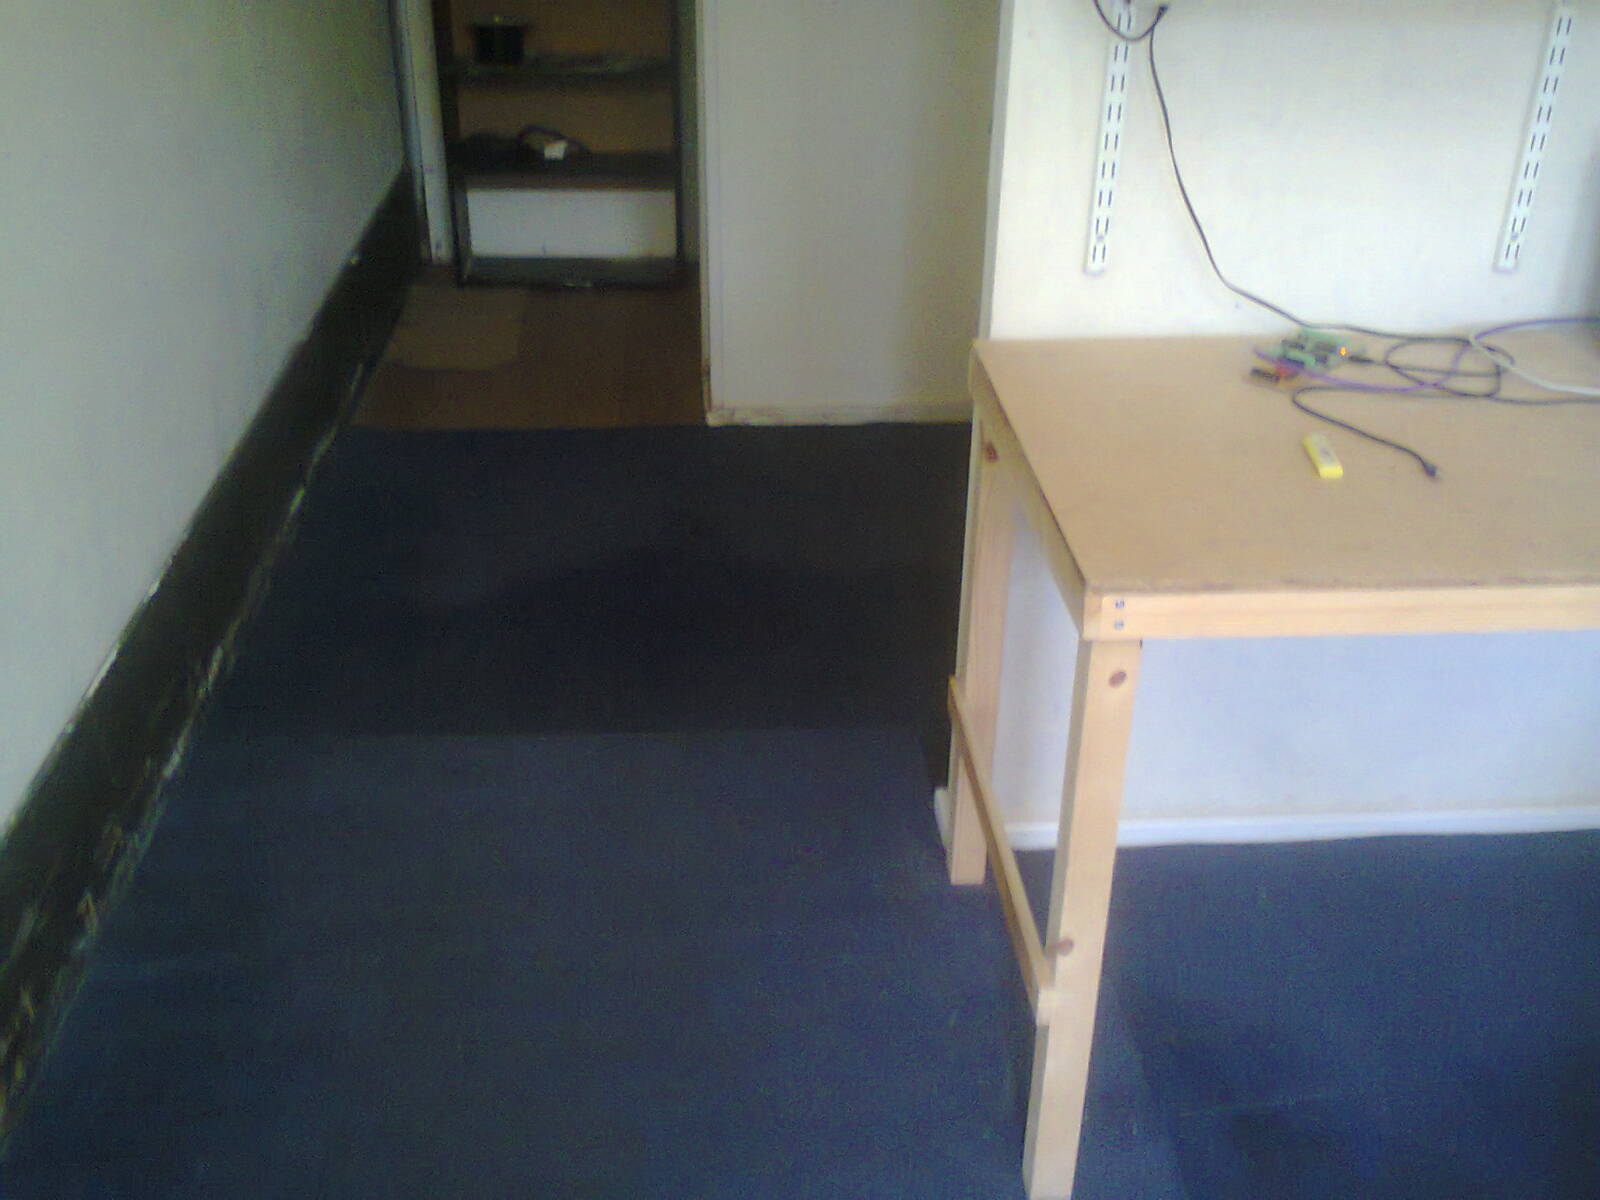
Ok, some days I get lucky. Other days I'm not so lucky. Yesterday was a not so lucky day. I thought I had two different colours of carpet. The blue with red speckles out of the rooms on the ward from the hospital, and the turqoise carpet from the corridor. Turns out that the rooms had very slightly different carpets in them, One was a lighter blue with a more brownish speckling. So, not enough of any one colour/pattern to do the whole box. Never mind. It's not supposed to be a thing of beauty, but a practical solution to the drumming of the ply floor and to absorb a little of the echo-y sound, and to add a little insulation to the floor to keep the box a tad warmer. Both those ends achieved, so although the colour difference was a bit of a downer, not the end of the world.
The floor is covered, and that's all that really matters. To trim it in neatly round the edges (the carpet was originally just slashed witth a Stanley knife and peeled up in sections) I've painted the original phenolic board scuff boards the same colour as the walls and fitted the ex-hospital recycled MDF skirting, which actually looks rather nice and gives a better finish to the 'room'.
You can see in this photo the colour difference between the sections of carpet :o(
Part of the ethos of the conversion was to use as much recycled, repurposed or reclaimed material as possible, so I have recycled carpet and skirting board. That's one eco box ticked, at any rate.
I know I have spent a chunk of cash on some 'new' stuff, like the Recticell insulation, door, cladding, the kitchen and some of the electrics but the sink is reclaimed, the loo is made from recycled pallets, a lot of the timber was salvage from Portishead and most of the 12v dc equipment and a goodly chunk of the solar thermal and solar PV was repurposed or recycled from 'stuff I had to hand'.
All in all, it's turning into quite a comfy office cum workshop, with loo and brewing facilities.
Ok, some days I get lucky. Other days I'm not so lucky. Yesterday was a not so lucky day. I thought I had two different colours of carpet. The blue with red speckles out of the rooms on the ward from the hospital, and the turqoise carpet from the corridor. Turns out that the rooms had very slightly different carpets in them, One was a lighter blue with a more brownish speckling. So, not enough of any one colour/pattern to do the whole box. Never mind. It's not supposed to be a thing of beauty, but a practical solution to the drumming of the ply floor and to absorb a little of the echo-y sound, and to add a little insulation to the floor to keep the box a tad warmer. Both those ends achieved, so although the colour difference was a bit of a downer, not the end of the world.
The floor is covered, and that's all that really matters. To trim it in neatly round the edges (the carpet was originally just slashed witth a Stanley knife and peeled up in sections) I've painted the original phenolic board scuff boards the same colour as the walls and fitted the ex-hospital recycled MDF skirting, which actually looks rather nice and gives a better finish to the 'room'.
You can see in this photo the colour difference between the sections of carpet :o(
Part of the ethos of the conversion was to use as much recycled, repurposed or reclaimed material as possible, so I have recycled carpet and skirting board. That's one eco box ticked, at any rate.
I know I have spent a chunk of cash on some 'new' stuff, like the Recticell insulation, door, cladding, the kitchen and some of the electrics but the sink is reclaimed, the loo is made from recycled pallets, a lot of the timber was salvage from Portishead and most of the 12v dc equipment and a goodly chunk of the solar thermal and solar PV was repurposed or recycled from 'stuff I had to hand'.
All in all, it's turning into quite a comfy office cum workshop, with loo and brewing facilities.
Wednesday, 4 November 2015
Getting There
Now I'm a wage slave again, finding time to fit in work down at the box is a little tricky, but I got here for the day on Sunday and B&Q phoned me up today to cancel my shift, so I squeezed in another day today.
I've thrown some cladding on the front wall. Not Homes and Gardens standard - it doesn't need to be - but enough to give me a solid wall over the Recticell insulation. A slap of the Sandtex to match the rest of the decor and job done.
I've also repurposed some of the ex-hospital carpet. Again, it doesn't need to be Axminster or Wilton standard, but it will insulate the floor a little and stop the box sounding so, er, 'boxy'.
Just a few more offcuts to fit in at the door end and some double sided tape to join the edges and it's a tidy job. I need a metal capping piece for where the carpet joins the vinyl by the loo, but that's another B&Q day to procure that.
I also have some nice skirting recycled from the hospital to trim in the side walls and cover the slightly ragged edges a little.
I've thrown some cladding on the front wall. Not Homes and Gardens standard - it doesn't need to be - but enough to give me a solid wall over the Recticell insulation. A slap of the Sandtex to match the rest of the decor and job done.
I've also repurposed some of the ex-hospital carpet. Again, it doesn't need to be Axminster or Wilton standard, but it will insulate the floor a little and stop the box sounding so, er, 'boxy'.
Just a few more offcuts to fit in at the door end and some double sided tape to join the edges and it's a tidy job. I need a metal capping piece for where the carpet joins the vinyl by the loo, but that's another B&Q day to procure that.
I also have some nice skirting recycled from the hospital to trim in the side walls and cover the slightly ragged edges a little.
Wednesday, 21 October 2015
Thursday, 15 October 2015
Front Wall Clad
I really wasn't sure what I wanted to do with the front wall of the office but in the end I just went with simple and easy to do. B&Q cheap interior cladding. Now whether I just leave it, paint it or stain it...that's another question.
Personally, I think it looks pretty reasonable as is. I may just leave it for now and worry about a final finish later on.
Subscribe to:
Posts (Atom)